New Tricks for Lower Power from Atmel

April 23rd, 2015

There has always been a trade-off between high performance and low power. Nowadays, microcontroller makers try to combine high performance while running with low power when idle.

The Cortex-M0+ processor core from ARM is claimed as their “most energy efficient”, and forms the basis of a number of recent microcontroller products.

Atmel‘s SAM D20, D21, and R21 feature the Cortex-M0+ core – and we have been working with these for a while:

SAM D21, R21, and D20 Xplained-Pro Boards

SAM D21, R21, and D20 Xplained-Pro Boards

Recently, the nice people at Atmel have kindly sent us an early example of the new SAM L21 Xplained-Pro board – featuring their latest, lowest-power addition to this range – the SAM L21.

Atmel SAM L21 Xplained-Pro board

Atmel SAM L21 Xplained-Pro board

Two New Tricks added in the L21 to allow it to achieve even lower power levels than the D21 are:

1. Powering-down unused modules

The D21 allows module clocks to be stopped, to reduce dynamic power consumption – but this still allows leakage currents to flow. By cutting the power, the leakage is greatly reduced.

2. Variable core voltage

The L21 has two “performance levels”: at the lower level, the core voltage is reduced to save power but with limited execution speed; the higher level allows maximum speed, but consumes more power.

Of course, all these features are to no benefit if the application doesn’t make best use of them – and doing that can be no mean feat!

To aid in optimising the system power consumption, the L21 Xplained Pro board features the Xplained Pro Analogue Module (XAM) to enable current consumption to be measured via the on-board debug interface (EDBG):

Xplained Pro Analog Module (XAM)

Xplained Pro Analogue Module (XAM)

Well, that’s enough writing for now – time to go off and give it all a try…

AirPi – It Texts!

February 7th, 2015

Well, it’s been longer than expected since my last post about the Snootlab AirPi – which I closed with, “the next step will be to get communication going with a PC, and send & receive text messages…”

So here we go!

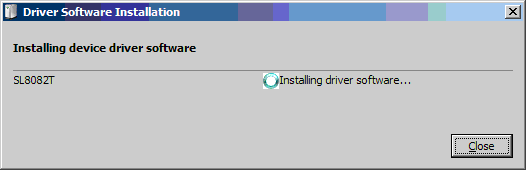
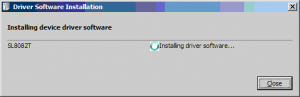
I’m using Windows-7 Professional (64-bit). Plug in the AirPi’s USB, and Windows does its thing with installing the drivers:

airpi-nstall-usb-1

airpi-nstall-usb-2

airpi-nstall-usb-3

And, finally:

airpi-nstall-usb-4

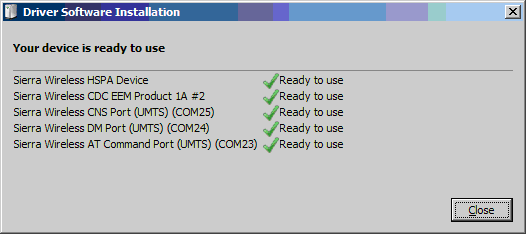
As the last line says, the AirPi AT Commands can now be accessed on COM23 (the number will vary according to what’s available on the particular PC in question).

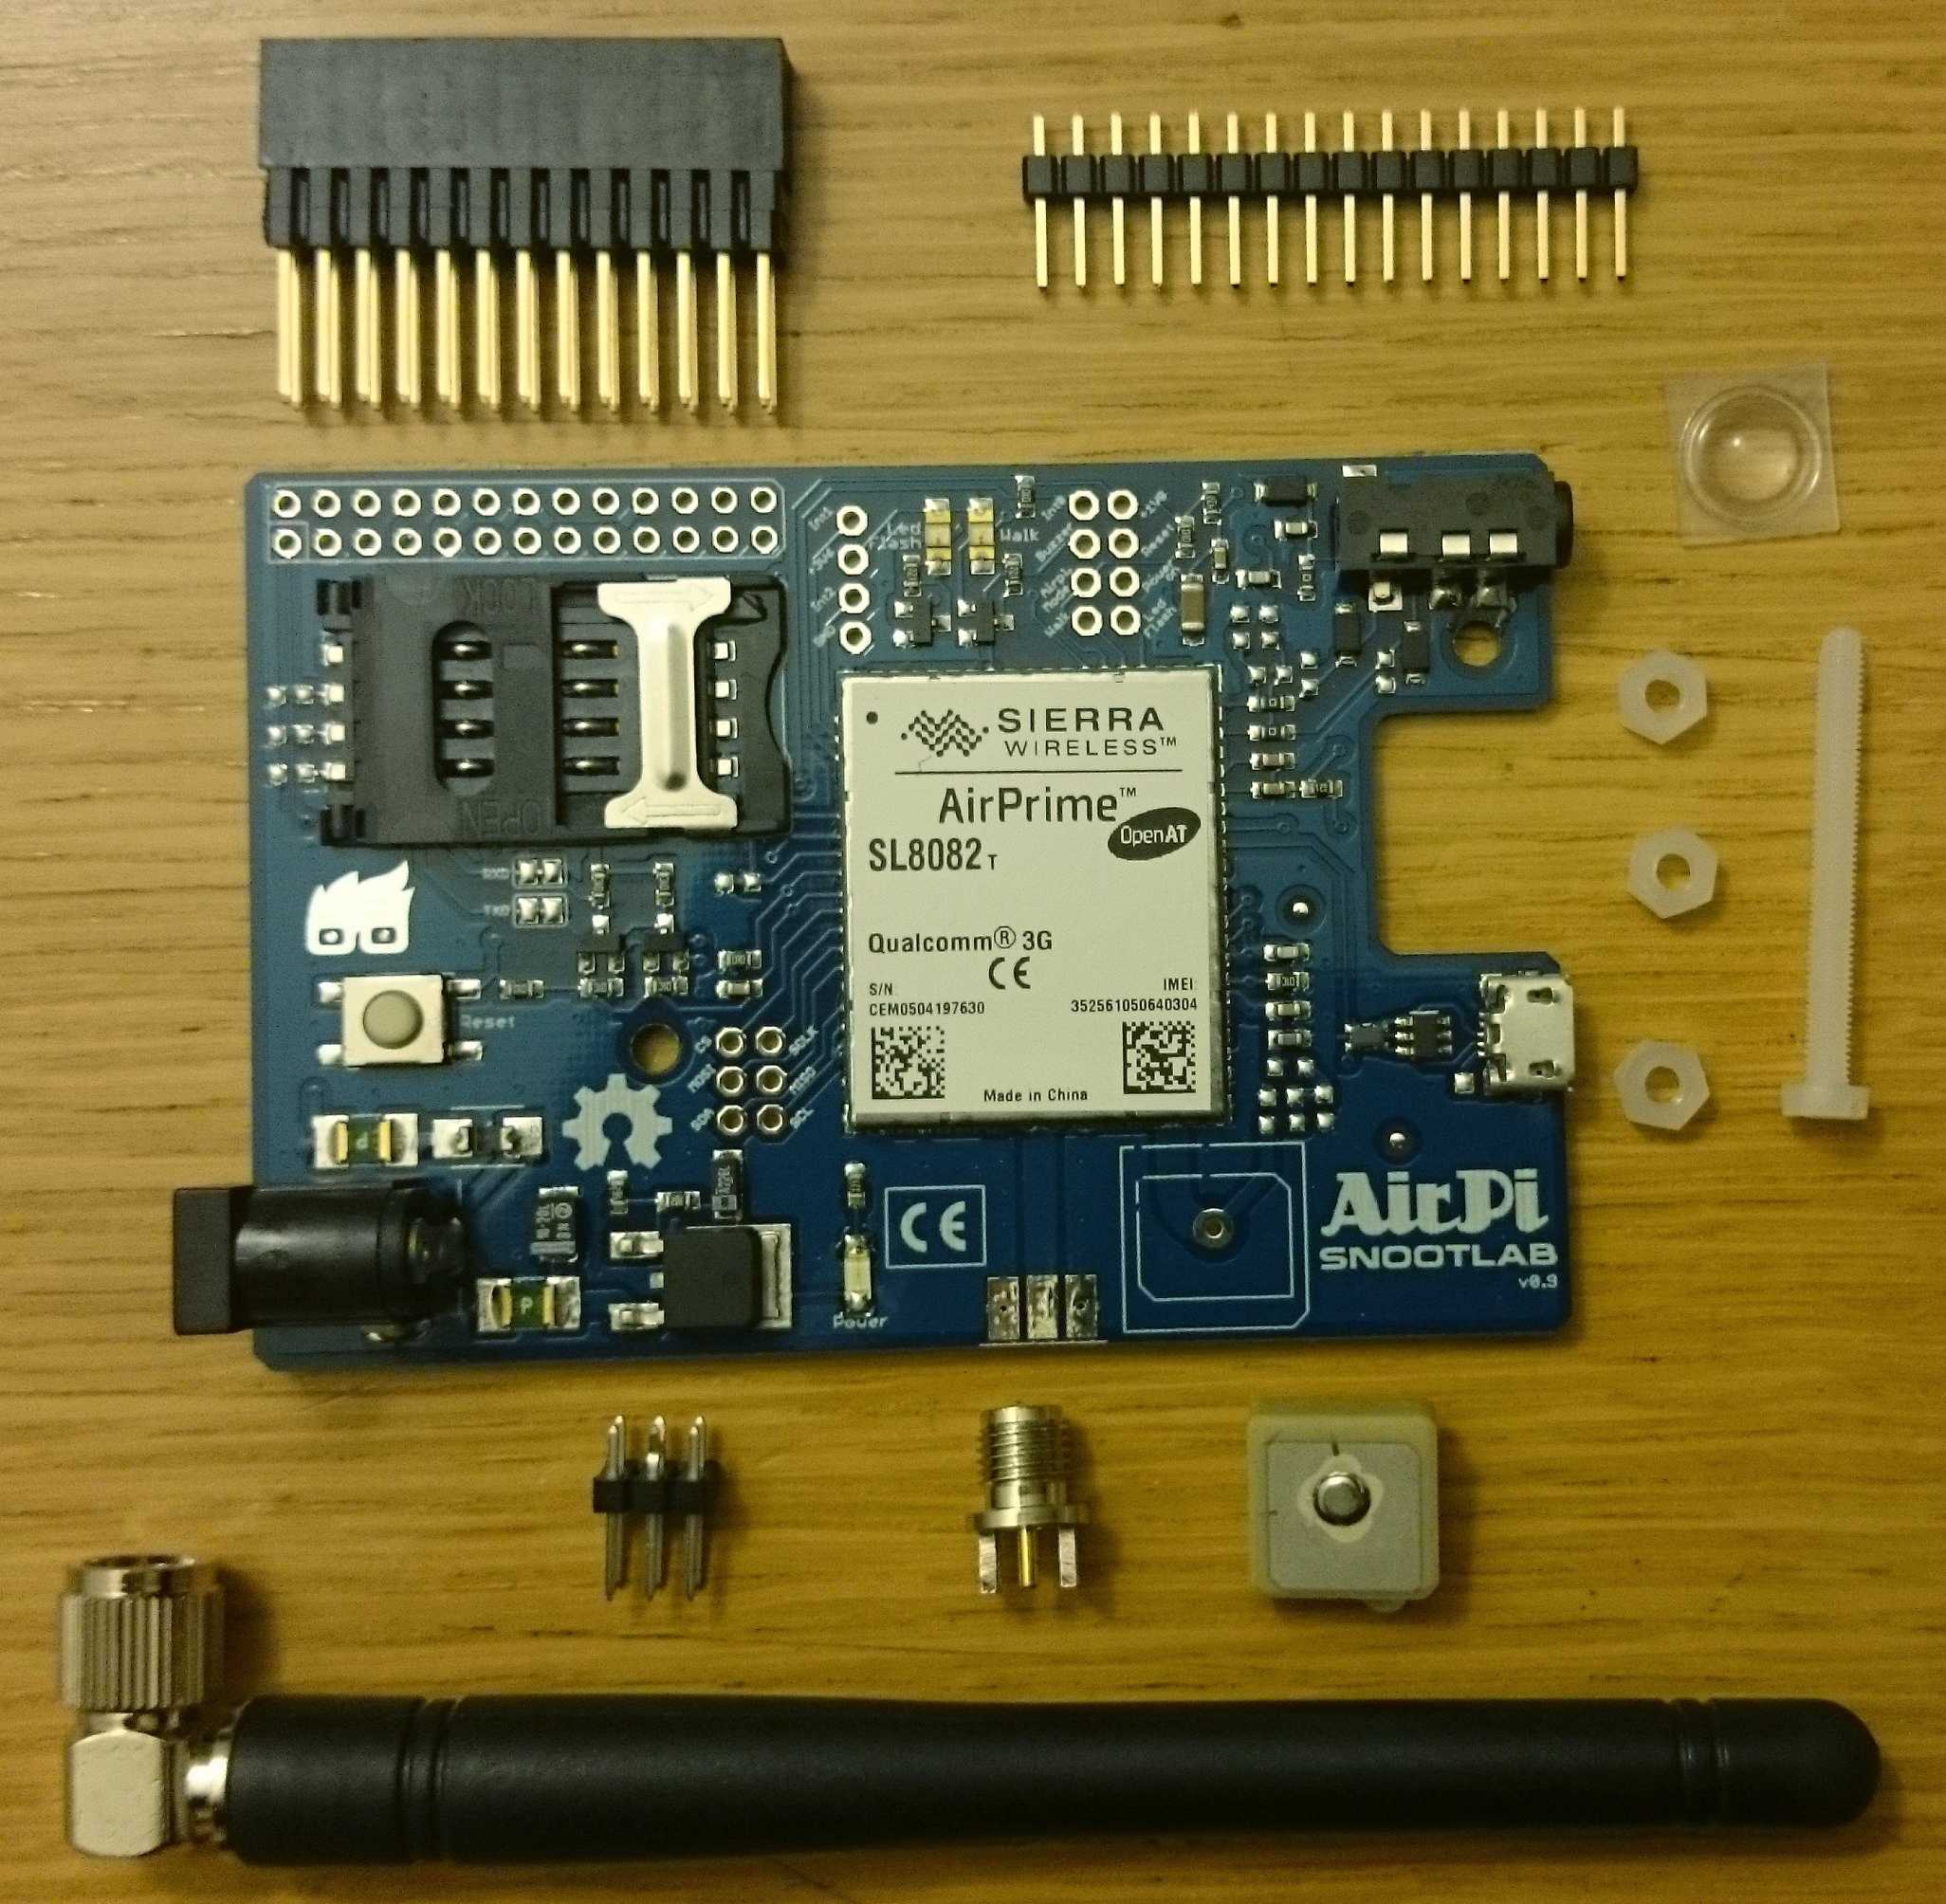
The Sierra Wireless SL8082T module on the AirPi supports both standard GSM AT Commands, and proprietary Sierra Wireless commands. The full AT Command set is described in the AT Commands Interface Guide – downloadable from the Sierra Wireless site.

To access the AirPi AT Command interface on the COM port, a terminal application is required – here, I’ll use PuTTY. The default baud rate is 115200.

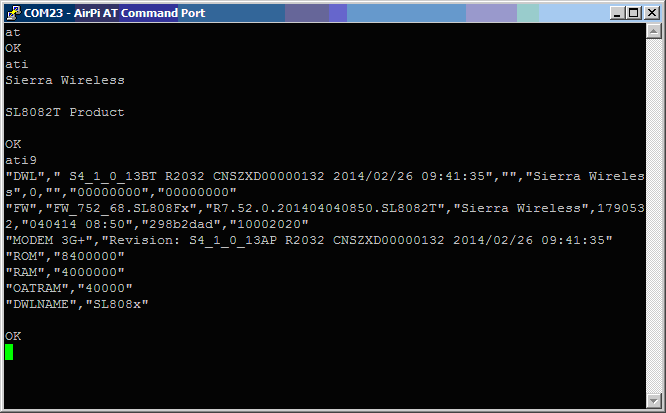
The first command to try with any modem is always “AT” – it should just reply with “OK“.

Another standard command is “ATI” – which should reply with some identification of the device.

The SL8082T supports the “ATI9” command, which gives some detailed information about the module – see the AT Commands Interface Guide for details.

This is how it all looks in the PuTTY screen:

airpi-at-0


A couple of other useful commands:

  • AT+COPS? – requests the current network registration state, and the network operator name.
    The reply is something like: +COPS 0,2,23430,2
    In order, those numbers mean:
    0 – the module is currently using automatic operator selection;
    2 – the module is currently using numeric operator format;
    23430 – the current network operator code, T-Mobile UK;
    2 – the module is currently using 3G technology.
  • AT+CNUM – requests the telephone number of the SIM, if available.
    Whether this actually gives a useful answer depends on the SIM – not all SIMs are configured for it.
    When supported, the reply is something like: +CNUM: “”,”07xxxxxx103″,129
    This means:
    “” – if the number had a name associated with it, that would go here;
    “07xxxxxx103” – the phone number (of course I’m not going to post it online!);
    129
    – the phone number is in National format (it’s a UK number).

And now we can actually try sending & receiving a text message; on the left is the PuTTY screen for the AirPi, and my phone to the right:

airpi-at-sms-0


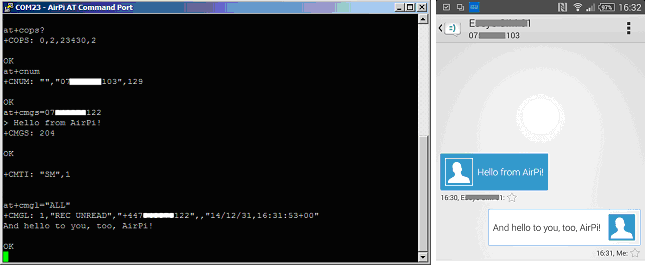
Sending the text is done in three stages:

  1. at+cmgs=07******122 – tells the AirPi we want to send a text to the given phone number;
  2. When it’s ready to accept the body of the message, the AirPi gives a ‘>‘ prompt, and we can type away. Hit Ctrl+Z to finish the text entry and send the message;
  3. When the message has been successfully sent, the AirPi confirms with +CMGS: 204 and then OK
    The number (204 here) is a reference which changes for each message.

As you can see in the phone screenshot, the message arrived, and I sent back a reply.

The AirPi indicates that a new text message has arrived with the +CMTI: “SM”,1 unsolicited response:
“SM” – indicates that the message has gone into SIM storage (the default);
1 – indicates that it is message number 1 in that storage.

AT+CMGL=”ALL” requests a list of all messages in the current default storage. The reply is:

+CMGL: 1,”REC UNREAD”,”+447******122″,,”14/12/31,16:31:53+00″
And hello to you, too, AirPi!

Which means:
1 – This is message number 1 in the store;
“REC UNREAD” – it’s a received message, and has not yet been read;
“+447******122” – the sender’s phone number;
,, – the phonebook name for the sender’s number would appear here, if available;
“14/12/31,16:31:53+00” – the date & time the message was sent.

And thus we have achieved the goal of sending & receiving text messages using the AirPi.

Q.E.F.

The AirPi Has Landed!

January 5th, 2015

This is about the Snootlab AirPi 2G/3G+GPS Shield for Raspberry Pi – not to be confused with the AirPi Raspberry Pi weather station.

I first came across the AirPi when it was announced at the June 2014 Sierra Wireless Developer Day:

Snootlab present AirPi at Sierra Wireless Developer Day 2014

Snootlab present AirPi at Sierra Wireless Developer Day 2014 (with thanks to @vrmvrm for the photo)

It is an add-on board – a “shield” – for the Raspberry Pi featuring a Sierra Wireless SL8082T cellular (2G/3G) module with GPS. The ‘T’ suffix indicates that this module supports the Open AT Framework – allowing a user application to be embedded within the module.

It was a long time in coming, but the production versions eventually went on sale in November, and I was finally able to get my hands on one:

AirPi Kit

AirPi Kit

As shown, a certain amount of self-assembly is required (a fully-assembled option is also available).

Most of the assembly is straightforward, although some instructions on the GPS antenna would have been helpful:

The GPS antenna is supplied with a paper mask on its underside:

AirPi GPS Antenna - As Supplied

AirPi GPS Antenna – As Supplied

This must be removed to reveal the adhesive coating:

AirPi GPS Antenna with Mask Removed

AirPi GPS Antenna with Mask Removed

Noting the correct orientation – as indicated by the AirPi PCB silkscreen – the antenna can then be stuck to the board, and its contact soldered in place (from the underside of the board):

AirPi GPS Antenna Fitted

AirPi GPS Antenna Fitted

And the assembly is complete:

AirPi Completed

AirPi Completed

The next step will be to get communication going with a PC, and send & receive text messages…

Didn’t we have a loverly time the days we went to Paris

June 26th, 2014

Sierra Wireless Developer Day 2014

Having attended the first (and, I think, only) Wavecom “developer day” back in 2007, and the first Sierra Wireless Developer Days last year, I was very much looking forward to this year’s event.

The event consisted of a private “Experts Day” with invited customers & distributors, followed by a public Developer Day with open registration.

At the Experts Day we were able to have some open & frank discussions with Sierra Wireless staff about our experiences with their products & services.

In particular, many of the guests (myself included) had been involved in alpha trials with Legato; so there was a good deal of feedback regarding that experience – with many of the Sierra Wireless Legato team members.

Sierra Wireless Experts Day 2014

We were also treated to some sneak previews of Sierra Wireless’s future intentions for Legato & associated tools and services – and I was glad to be reassured that Open-AT is not slated to be discontinued any time soon.

After the end of the Experts Day, we joined the prelude to the Developer Day – a dinner at the 56th floor restaurant in the Montparnasse Tower, “The Top Of Paris”. We had a great time, with stunning views over Paris as the sun set.

Sierra Wireless Developer Dinner 2014

The Developer Day had about 140 attendees representing customers, partners, network operators, etc; plus Sierra Wireless staff. That was about twice last year’s figure!

The morning consisted of presentations from Sierra Wireless, Wind River, and the Eclipse Foundation M2M. Legato was Sierra Wireless’s topic du jour – and we witnessed the public opening of the Git Hub repository!

During breaks between sessions, and over lunch, there were about a dozen demonstrations from customers, partners (including some from the Experts Day) and Sierra Wireless showcasing various products & services. This was a great opportunity to network, nibble, and see stuff in action.

The afternoon divided into two “tracks”: one “technical” and the other “business”. In some ways it was a shame to have to choose one or the other – but I guess otherwise it wouldn’t be possible to fit everything into just one day!

The afternoon technical track consisted of some tutorial presentations by Sierra Wireless, and some of the demonstrators describing their work

All in all, it was a great event – certainly looking forward to next year!

 Presentations from the Developer Day are available in the Developer Zone on th Sierra Wireless site.

M2M and the Vending Machine

March 6th, 2013

Vending Machines

Vending Telemetry has been around since long before the term “M2M” was coined.

Vending machines are one of the classic use cases cited in just about any item about M2M!

This is probably because just about everyone is familiar with vending machines,  and also familiar with the frustration of a machine which is broken, or out of stock, or out of change – or all three!

Thus there are clear customer benefits to getting these conditions reported and, thus, rectified as quickly as possible. The whole point of vending machines is that they can operate unattended – so some form of remote monitoring is clearly essential to prompt problem reporting.

In addition to the customer benefits, there are also clear benefits to the machine operators:

  • Up-to-date sales information allows restocking visits to be optimised – so that unnecessary visits are avoided, and sales are not lost due to lack of stock or change;
  • Up-to-date machine status information can help to optimise service and repair visits – and may even enable some problems to be identified before they develop into service-affecting faults.

In these days of tightened budgets and heightened environmental awarness, anything that can reduce unnecessary work and travel has to be a good thing!

Once a communication facility is in place, this also opens up a whole range of new possibilities – such as changeable advertising, cashless payment, etc.

Generally, vending machines don’t come ready-fitted with remote monitoring capability,  so adopting M2M (or “Telemetry”) requires retrofitting some sort of communication device – which is where our extensive experience of  interfacing, control, and communication with embedded microcontrollers comes in.

For some case studies, see:

Identifying a Modem’s COM Port in Windows-XP

September 15th, 2011

Windows usually communicates with a modem via a COM Port interface – whether that’s a “real” serial port, or a “virtual” serial port for an integrated modem or via USB.

To find what COM port Windows is using, start by locating the modem in Device Manager:

Device Manager

Right-click the required modem in the list:

Modem right-click menu 

Choose Properties to open the modem properties:

Modem Properties - General

Now choose the ‘Modem‘ tab:

Modem Properties - 'Modem' Tab

Note that the Port is identified at the top of the panel – in this case, it’s COM3.

So you’re thinking of starting with ‘C’…?

August 8th, 2011

This entry contains much of the same material as Things you should’ve learned in ‘C’ class: 0 – Introduction  – but aimed at those who have not (yet) taken a ‘C’ class.

Many people seem to adopt the jump-in-at-the-deep-end-and-hope-you-learn-to-swim-before-you-drown approach to start developing in ‘C’.

While it is, of course, possible to learn a programming language by yourself, it requires a good deal of disciplined study and practice to learn it well. Therefore I thoroughly recommend a taught class as the best way to go.
I can recommend the following local training providers:
http://www.doulos.co.uk
http://www.feabhas.co.uk/

Other providers are, of course, available; eg,
http://www.netrino.com/Embedded-Systems/Training-Courses
http://www.ganssle.com/classes.htm

And some offer “self-study” options; eg,
http://www.netrino.com/Boot-Camp-Box

If you do intend to go ahead with a DIY approach, the first thing you will need is a good textbook – or textbooks. ‘C’ is a very long-established and widely-used language – so there are plenty to choose from!

Some general books are listed here: http://www.keil.com/books/genbooks.asp

The Association of C & C++ Users (ACCU) website has a section dedicated to book reviews: http://accu.org/index.php/accu_documents/book_reviews

A free online ‘C’ textbook can be found here: http://publications.gbdirect.co.uk/c_book/

A complete set of ‘C’ programming course notes is available here: http://www.eskimo.com/~scs/cclass

Answers to a range of Frequently-Asked Questions about ‘C’ programming can be found here: http://c-faq.com/

A description of all the functions provided by the standard ‘C’ library can be found here: http://www.cplusplus.com/reference/clibrary/

Addendum – 1 May 2012:

I stumbled upon this this great list of ‘C’ books, tutorials, FAQs, etc:

http://www.avrfreaks.net/index.php?name=PNphpBB2&file=viewtopic&t=22514

Although it starts with some AVR-specific stuff, the vast majority is entirely general.

Addendum – 10 Dec 2013:

Wikibooks has a free online ‘C’ book offering, “a comprehensive look at the C programming language and its features”

http://en.wikibooks.org/wiki/C_Programming

(PDF, printable, and e-reader versions also available).

Things you should’ve learned in ‘C’ class: 0 – Introduction

December 12th, 2010

I see a worryingly large number of posts from ‘C’ users on internet forums displaying a lack of understanding of the basics of  ‘C’ development in the Real World.

Many of these are standard, classic ‘C’ issues – applicable to any environment in general – and some are specific to Embedded development in particular.

This is intended to be the first in an occasional series to address some of these issues.

Hopefully, educators may also find these posts useful in considering whether any changes in their material or presentation might be beneficial…

As a starter, let’s consider some basic reference materials to keep at hand:

The first must, of course, be a good ‘C’ reference book such as The ‘C’ Programming Languageby Brian Kernighan and Dennis Ritchie – available through any good book shop, as well as online bookstores.
Some further book recommendations can be found here: http://www.keil.com/books/

A free online ‘C’ textbook can be found here: http://publications.gbdirect.co.uk/c_book/

Answers to a range of Frequently-Asked Questions about ‘C’ programming can be found here: http://c-faq.com/

A description of all the functions provided by the standard ‘C’ library can be found here: http://www.cplusplus.com/reference/clibrary/

In my opinion, you can’t beat a good, taught class. I can recommend the following local training providers:
http://www.doulos.co.uk
http://www.feabhas.co.uk/

Other providers are, of course, available; eg,
http://www.netrino.com/Embedded-Systems/Training-Courses
http://www.ganssle.com/classes.htm

And some offer “self-study” options; eg,
http://www.netrino.com/Boot-Camp-Box

Addendum – 1 May 2012:

I stumbled upon this this great list of ‘C’ books, tutorials, FAQs, etc:

http://www.avrfreaks.net/index.php?name=PNphpBB2&file=viewtopic&t=22514

Although it starts with some AVR-specific stuff, the vast majority is entirely general.

Addendum – 10 Dec 2013:

Wikibooks has a free online ‘C’ book offering, “a comprehensive look at the C programming language and its features”

http://en.wikibooks.org/wiki/C_Programming

(PDF, printable, and e-reader versions also available).

Hot Tips for Cold Starting

November 30th, 2010

The cold weather is with us again here in Southern England.  Well, we call it “cold”;  others may differ – including those further North in the UK!

First snow of the 2010-11 winter

These conditions put extra strain on a car’s electrics, and can lead to starting problems. 
So here are some Hot Tips for Cold Starting:

The important thing to remember is that, once the engine has stopped, there is nothing putting any power into the battery – therefore anything electrical at all that’s left on after the engine’s stopped will be flattening the battery.
So the first tip is:

Before you stop the engine:
Be sure to turn off everything electrical; lights, demister, blower, etc.
Close electric windows before stopping the engine.

The second tip is the converse of the first:

Do not switch anything on before the engine has started. 
Start the engine as soon as possible after turning on the ignition – don’t wait with just the ignition on unless the car requires it(check handbook for details; eg, a diesel with glowplugs).

Tip for cars with manual transmission:

Depress the clutch pedal (“let the clutch out”) while starting.
This reduces the load on the starter and, hence the battery – thus increasing your chances of starting successfully

If you do need a “jump” start, remember that modern cars have lots of electronics in them; therefore be very sure to follow any directions in the handbook to avoid damage. If in doubt, leave this to a professional assistance service.

Do not be tempted to “jump” start a car using a so-called “Leisure” battery – as used for camping, caravans, etc. These are just not designed to give the huge “kick” required to start an engine (especially a diesel), and are likely to be damaged by it. (If you have a freshly-charged leisure battery, connecting it to the car battery for 5-10 minutes might charge the car battery sufficiently for a start; but be sure to disconnect it before starting and, again, follow any handbook directions).

Final tip, after a “jump” start:

Take the car for a good run – say, 15-20 minutes.
The reason you needed a jump start was that the battery was flat; if you don’t take steps to ensure that the battery gets well charged, the same will happen again!
More charge is generated at higher engine speeds (within reason), so the “open road” at “cruising speed” will be better than around town, if possible.
It is not recommended to leave the engine “idling” for long periods, nor to “rev” it while stationary. Again, be sure to follow any directions in the handbook to avoid damage and, if in doubt, seek professional advice.

Of course, if the car has persistent starting problems, it should be checked for faults in the battery and the charging and starting systems. Remember that batteries have a finite life.

Disclaimer: This post is presented in the hope that it may be of some use and/or interest; it is given “as-is” and entirely without any warranty of any sort whatsoever – any use of it is entirely at your own risk. If in doubt, seek advice from your vehicle provider, maintainer, or other reputable source.

Didn’t we have a loverly time the day we went to Earl’s Court

October 25th, 2010

Embedded Live 2010 (formerly the embedded systems show),
Earl’s Court, London, England:

Earl's Court - Embedded Live 2010

I had visited the Embedded Systems Show (as it then was) at the NEC in Birmingham for many years. Attendances had been dwindling of late and, last year, it moved to FIVE in Farnborough (home of the famous Airshow).

This year, the show was under new ownership, rebranded as Embedded Live, and at a new venue – Earl’s Court in London.

We were most grateful to receive a special “opening offer” from UBM, the new organisers, to have a stand in the Connected M2M Devices pavilion at a very favourable introductory rate:

Antronics Ltd

This was our first time exhibiting at a show like this and, I must say, it was a fairly painless experience – thanks to the guys (and gals) at UBM.

We had a reasonable stream of visitors – it was good to meet some old friends, and to make some new contacts.

Special thanks to ARM for providing free drinks on the Wednesday night!

Some people doubt the value of exhibitions in this Web age, but I still think there’s a place for seeing stuff “in the flesh” and meeting real people face-to-face. So I hope next year’s show will be bigger and better…

Our stand